|
My profound and humble thanks go out to Rusty Wales, my everlasting pal, who reportedly discovered winemaking after his ordeal with the frustration and experience and urged me to make one of my own wine someday. Sure enough I did it a couple of years ago and my dear wife, Francine, has just joined me winemaking this year. Also thanks to all who preceded me in experimenting, refining, and passing on the knowledge I attempt to reflect herein. What wines we have produced, and therein lies the true reward! It is not only that but I have become Rusty's Deaf Grapevine Webmaster. My very first "Liebfraumilch" wine is a style of semi-sweet white German wine which may be produced in the regions Rheinhessen, Palatinate, Rheingau and Nahe. The name is a German word literally meaning "Beloved lady's milk". There is a diversity of flavors and sheer self-satisfaction are reasons enough to make one's own wines. For those of you wanting to attempt it for the first time like me simply looking for concentrate juice that can be bought at any wine retailer. I hope you will find this site useful. Bobby, the producer of Estate of Skedsmo Wines

Bobby's important notes: There are four steps in winemaking. "You do one step at a time so that you will not feel overwhelmed with many new materials and its procedures", he says. You will see any bold font that indicates what equipment you will need to make your wine for your convenience. You will see some pictures inserted between the step by step instructions just for your clarification. Any time you do about winemaking, you must record in your log book like temperature, specific gravity, date and etc. Do like a real chemist! This step by step instruction will lead you successfully through the clarifying steps of making white wine, as well as the bottling. Concentrate juices are a good place to start in understanding the art of fermenting wines so that you do not have to worry about how to crush the grapes and correct sugar levels, acidity, and pH.
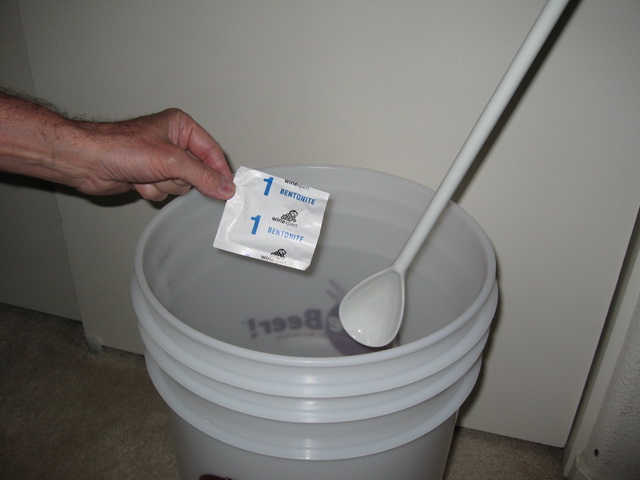
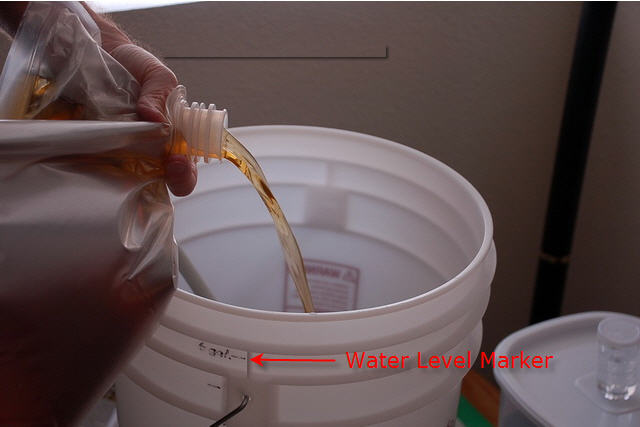
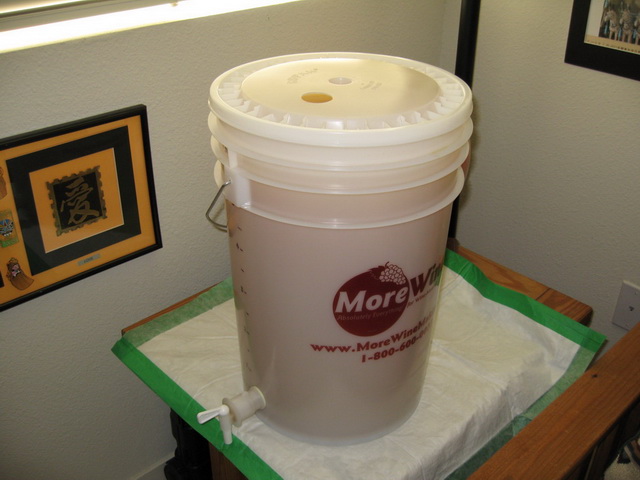
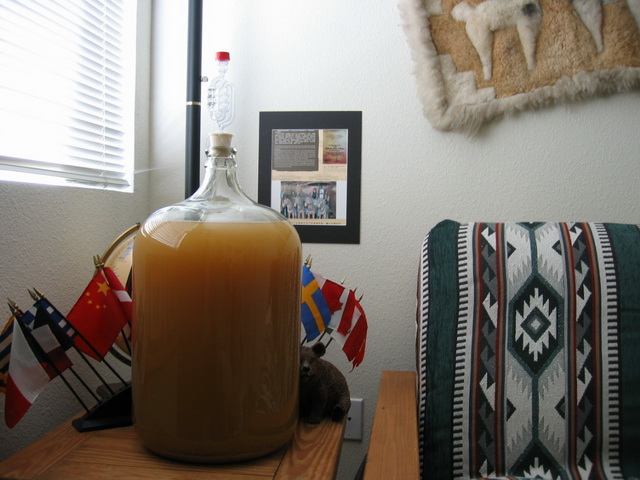
#1 Primary Fermentation 1. Liebfraumilch (grape juice concentrate) by Winexpert - Vintners Reserve bought at the Wine, Wine and More Wine in Concord, California. 2. Measure and draw a line in permanent marker on the primary fermenter (a large white bucket) at the water level of 6 gallons so you will know where to reach that level 3. Put the primary fermenter up at least three feet on a sturdy table 4. Add one-half gallon of hot water to the bottom of primary fermenter \/
5. Stir the water with a long spoon vigorously and slowly sprinkle the content of bentonite onto the surface 6. Stir for 30 seconds to ensure even dispersal and break up any clumps 7. Pour the Vintner's Reserve, grape juice concentrate, into the primary fermenter \/
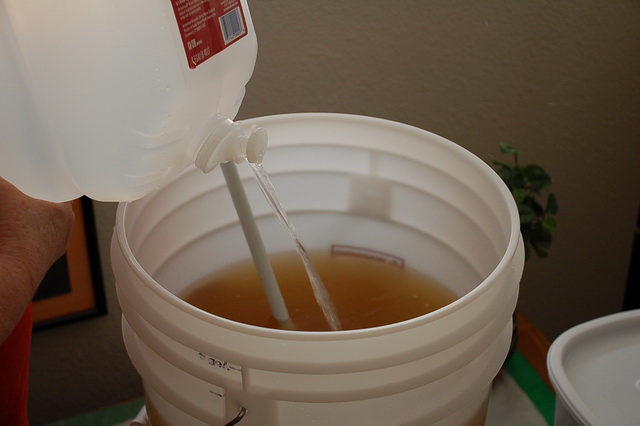
8. Top up fermenter to the six gallon mark with cool water from bottles \/
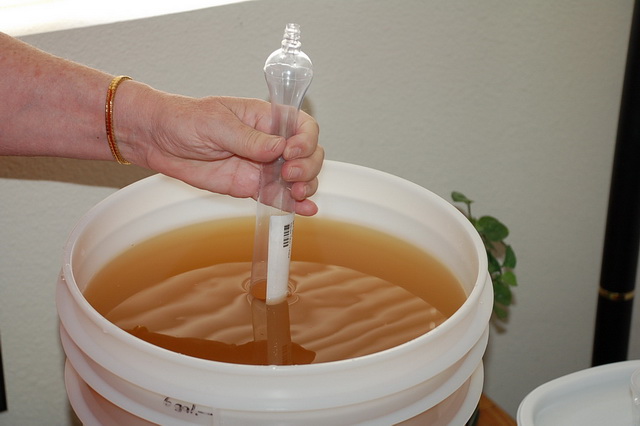
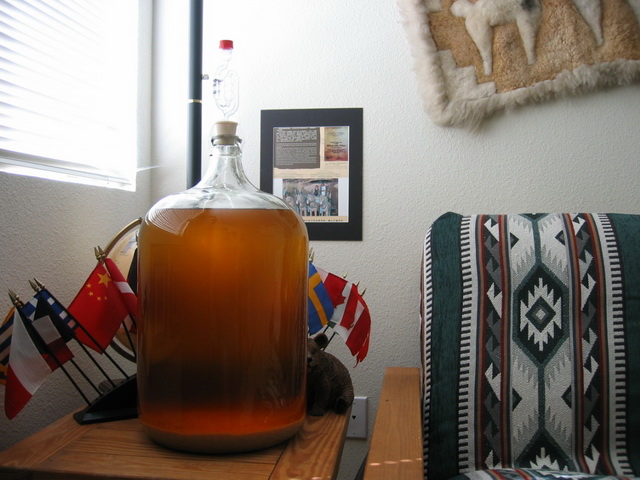
9. Stir vigorously for 30 seconds 10. Draw a sample of the juice with a sample taker \/
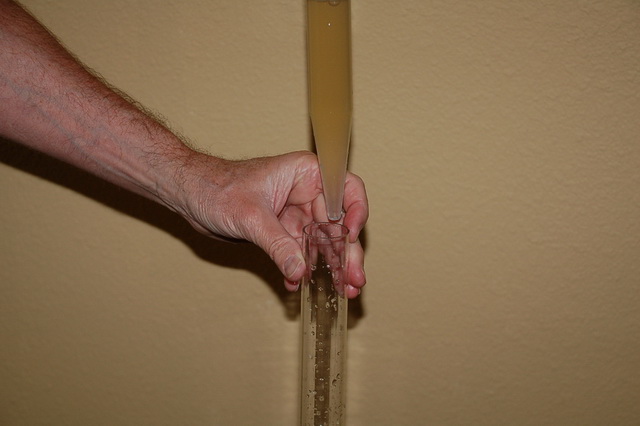
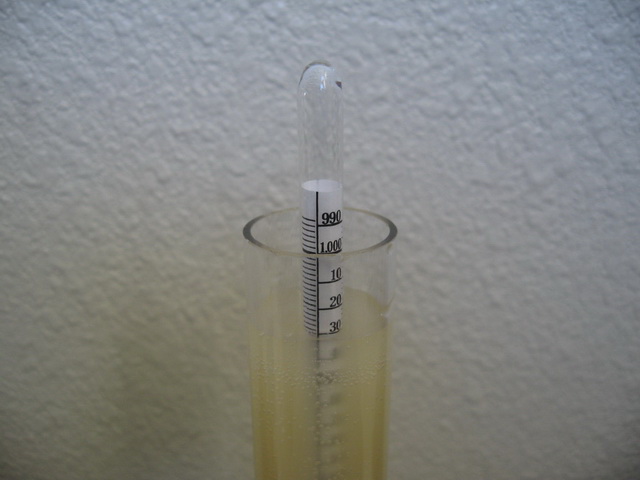
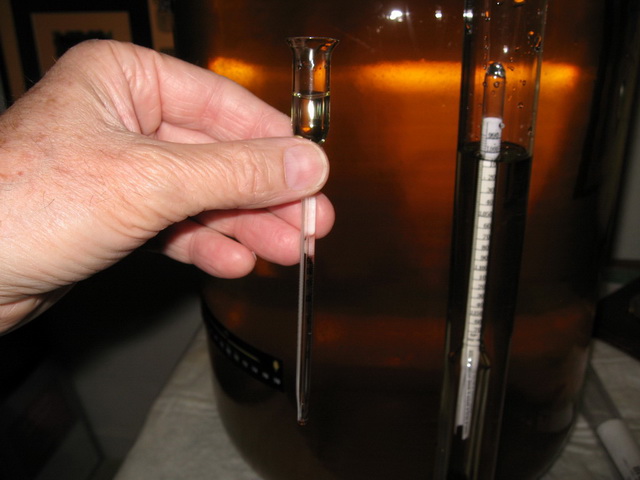
11. Drop the sample of juice into the hydometer jar \/
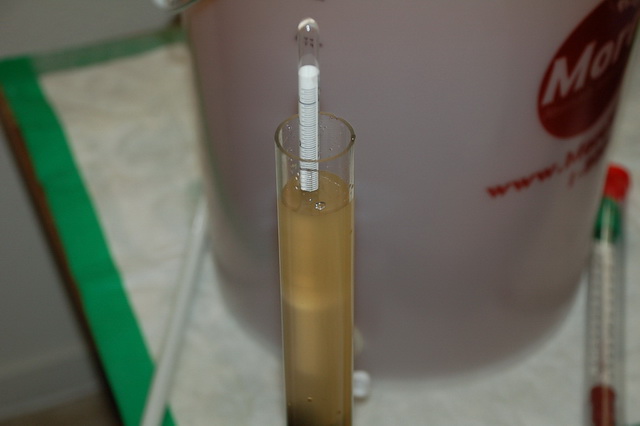
12. Place the hydrometer into the hydometer jar to check the specific gravity. It should read between 1.070-1.085. \/
13. Use the thermometer to ensure that the temperature of the juice is between 65-75 degree \/
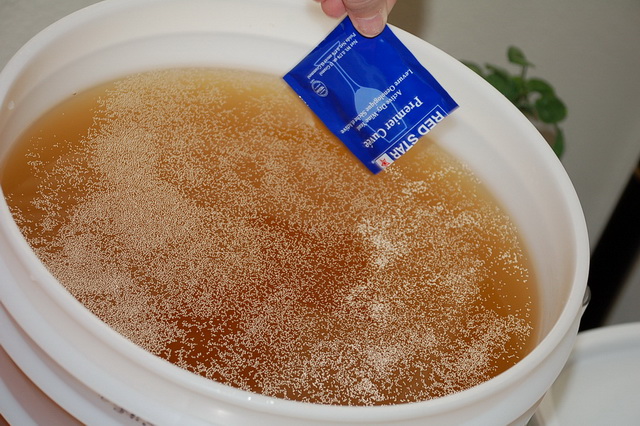
14. Sprinkle yeast onto the surface of the juice. Do not stir at this stage! \/
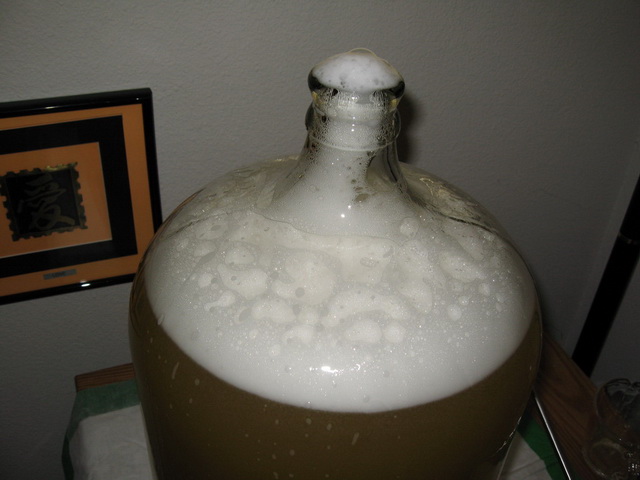
15. Cover the primary fermenter with a lid 16. Place it in an area with a temperature 65-75 degree. Fermentation should start within 24-48 hours. \/
17. After 4-5 days, draw a sample of the juice and use your hydrometer and hydometer jar to check the specific gravity. It should read 1.010 or less. When it reads 1.010 or less, go to the Step #2. 18. At this time it reads 1.030. Wait until it reads 1.010 or less. \/
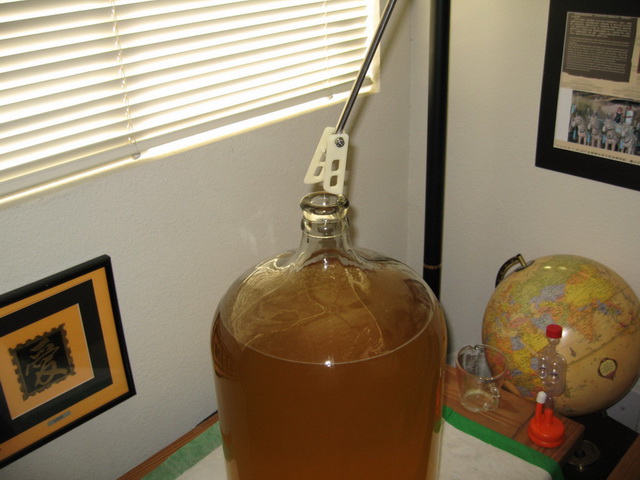
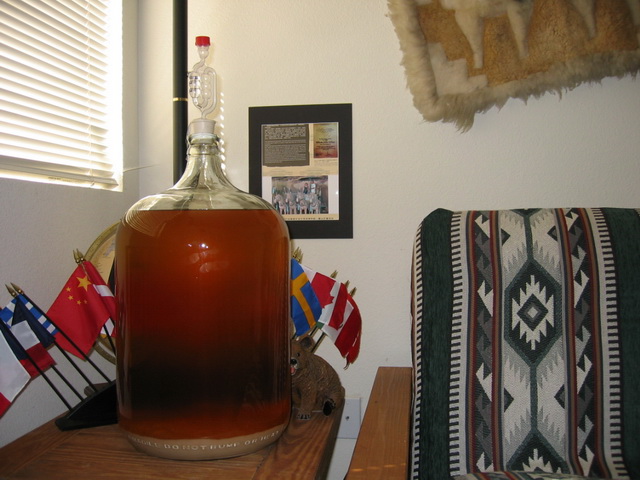
#2 Secondary Fermentation 1. Siphon wine into a clean, santised carboy or use the spigot (the plug of a faucet that regulates the flow of liquid) but you'd better make sure it flows slowly or it may draw the sediment go along the juice. Note: Be sure to have glass carboy because it is the ideal material for secondary fermentors, because it keeps out oxygen, and you can see at a glance how your wine is clarifying. \/
2. Leave most of the sediment behind. This will leave a space at the top of the carboy. Do not top up at this stage. This space is required for stirring and additions during the next Step #3(Stabilising). \/
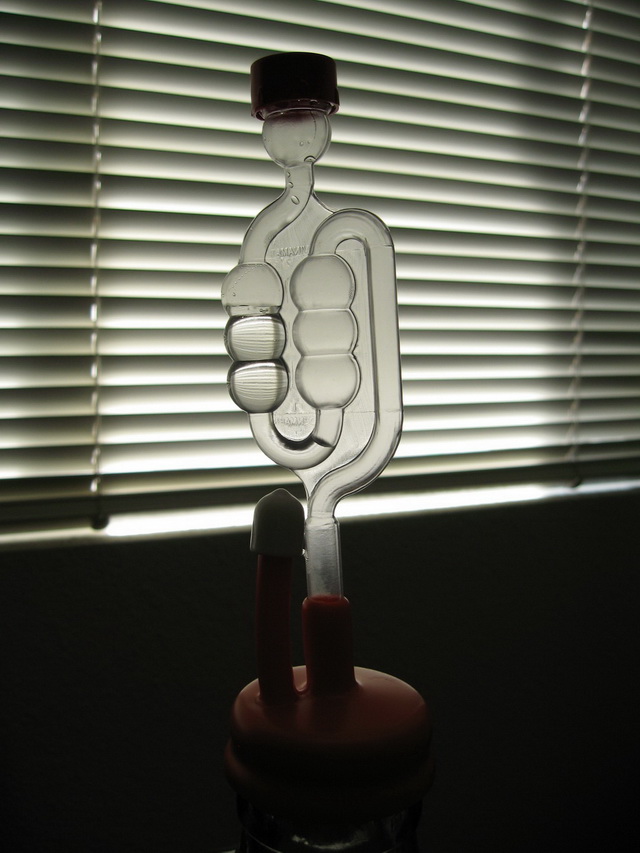
3. Attach airlock with orange carboy hood with cap to carboy \/
4. Put the carboy up at least three feet on a sturdy table \/
5. Leave carboy in fermentation area for a further 10 days or when it reaches read at .996. \/
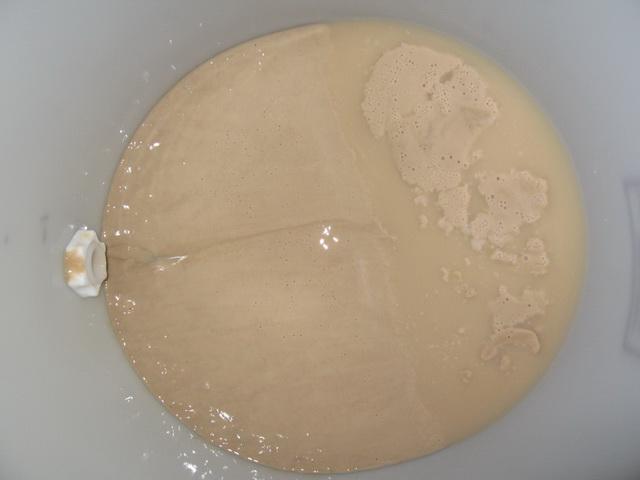
6. Notice that the juice becomes clear after a few days, but leave it alone until the read reaches .996 before we do the Step #3.
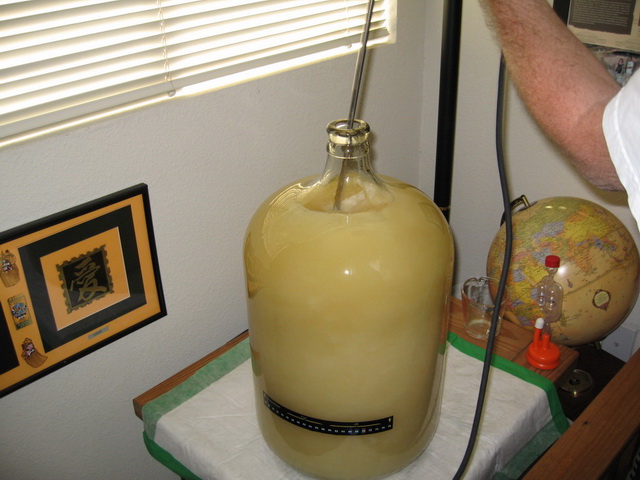
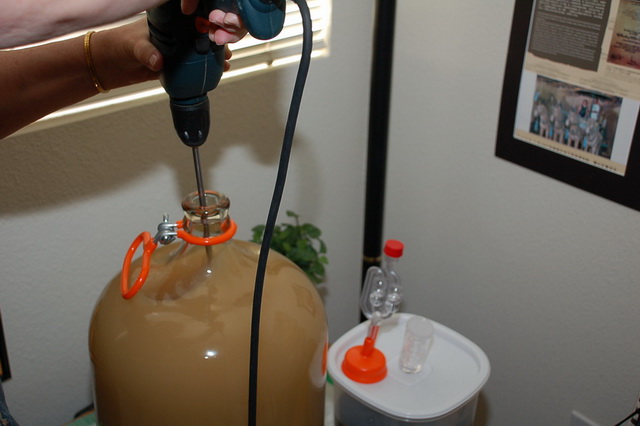
#3 Stabilising and Clearing 1. After 10 days, check the specific gravity, it should read 0.996 or less. Verify a stable gravity by checking again the next day. If the gravity has changed, leave the wine until the reading is stable on two consecutive days. 2. Winexpert kits require the sediment to be stirred back into suspension. Please be sure to stir all of the sediment up from the bottom. This stirring, whip the wine until it stops foaming. Drill-mounted stirrer can save laborous. \/
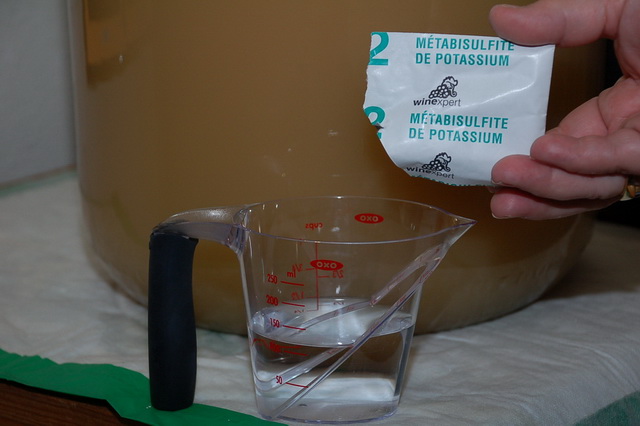
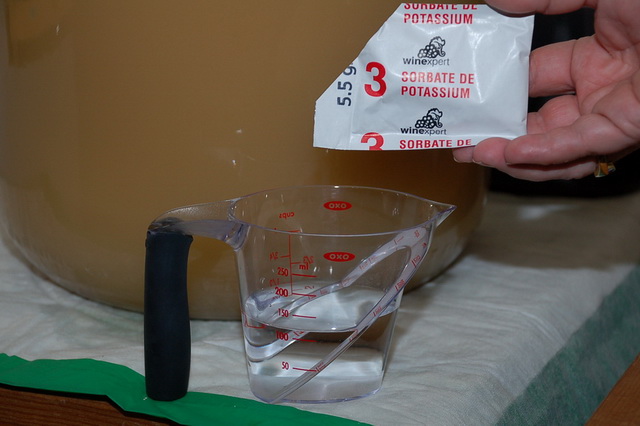
3. Dissolve contents of packages; #2 metabisulphite and #3 sorbate in 8 fl oz cup of cool water from bottle \/
4. Add to carboy and stir very vigorously for 2 minutes to disperse the stabilizer and drive off CO2 \/
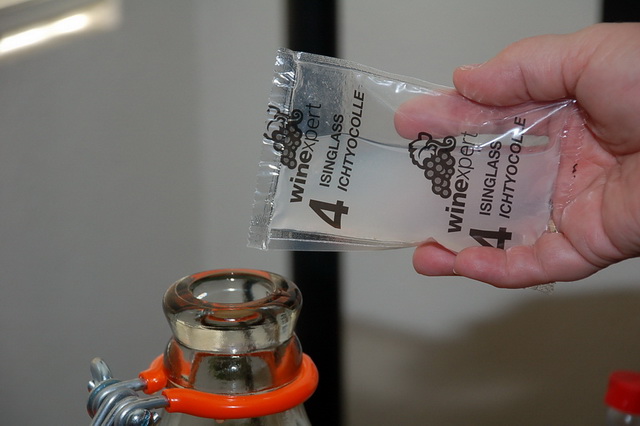
5. If your kit came with a small bag (F-Pack), then make sure that there is a room in your carboy for the contents of this pack, remove 2 cups of wine. Reserve this for topping up the carboy later. If it is not provided, skip to #8 6. Pour gently content of F-Pack into the carboy 7. Stir vigorously for 60 seconds. The gravity should read between 0.998 and 1.005 depending on the style of the kit. 8. Shake the content of package (#4 chitosan or isinglass clarifier) and pour it into carboy \/
9. Stir vigorously for 2 minutes to drive off CO2 gas \/
10. Top up carboy to within 2 inches of the bottom of the bung by using cool water from bottle, reserved wine from the F-Pack addition or same kind of wine from the bottle if available 11. Ensure airlock is filled halfway with water 12. Reattach airlock 13. Leave the wine 14 days to finish clarifying 14. After 14 days, check your wine for clarity by drawing a small sample into a wineglass and examining it in good light. If it is not completely clear, leave it for another 7 days. (Don't bottle cloudy wine) \/
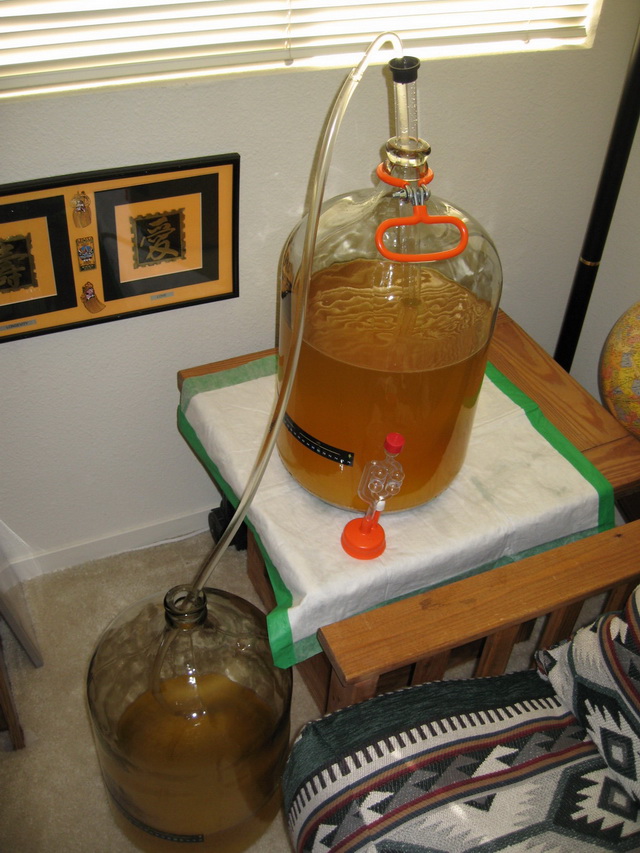
15. When it is crystal clear but the sediment is still at the bottom of carboy. It may be good idea to rack the wine into a 5-gallon carboy to make sure that there will be no more sediment at the bottom when it is time to rack the wine into the bottles. Note that it may be problem when the sediment is present during racking wine into the bottles. Use the auto-siphon with tubing to transfer the wine into another carboy.\/
16. Wait for a few days until there is no more sediment at the bottom before you can be ready for bottling which means next Step #4 for you.
#4 Bottling 1. Draw a sample of the wine and use the hydrometer to check the specific gravity and the vino-o-meter to check percentage of alcohol by volume for recording. \/
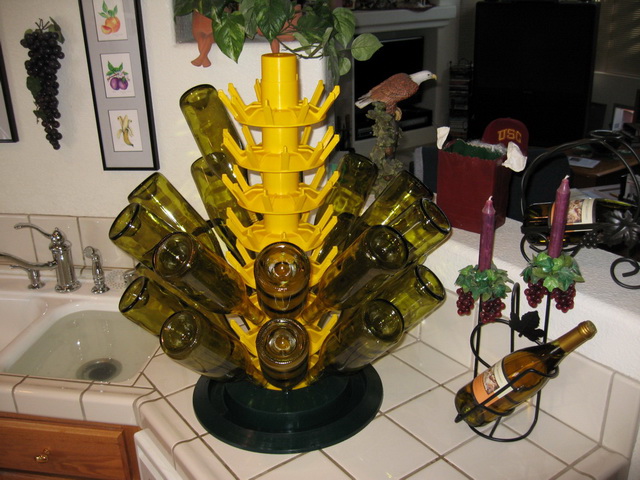
2. Before bottling, you need to make sure that all bottles are sanitized 3. Clean bottles with Five Star powder brewery wash (PBW) that will remove stubborn stains inside the bottle 4. Measure one tablespoon of PBW and dissolved in warm water 5. Let the bottles soak until they are clear of stains (no scrubbing will be required) 6. Drain solution, then rinse 7. Sanitize with Five Star’s Star Scan solvent (1 oz. per 5 gallons of warm water) 8. Place bottles on the bottle tree and let them soak, drain and do nothing about rinse \/
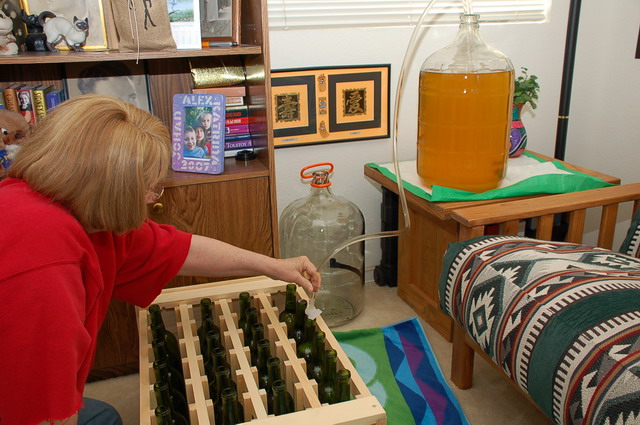
9. Siphon your wine into bottles, but make sure to leave two finger-widths of space between the bottom of the cork and the level of the wine in each bottle. \/
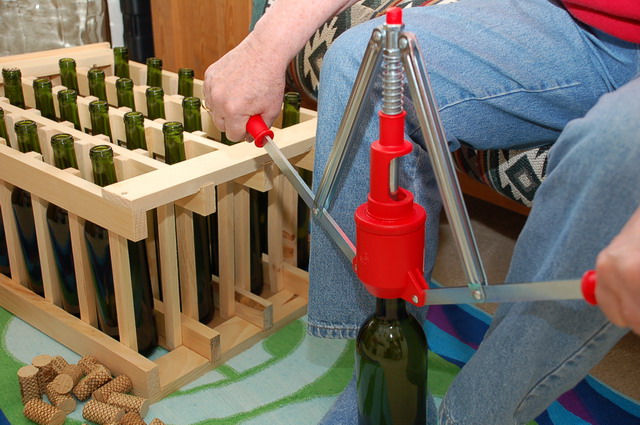
10. Seal the bottle with a good quality cork, but first you have to soak the corks for 5 minutes, and insert corks in double lever corker and pull down both handles \/
11. Leave bottles upright for three days 12. Position heat shrink sleeve directly over the top of bottle and heat via heat gun or hair blower until it is shrunk tightly \/
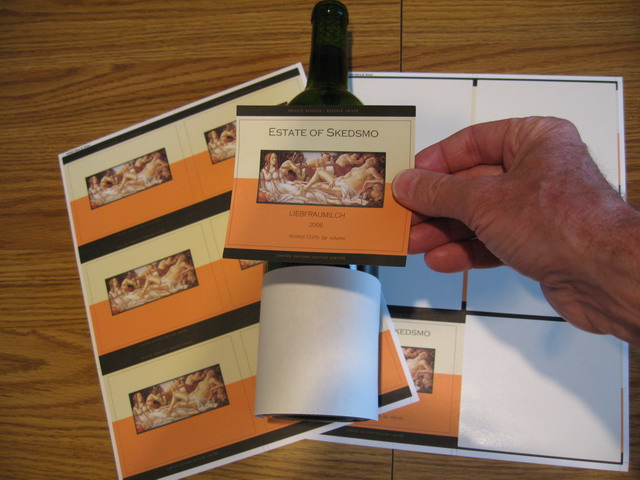
13. Stoney Creek's POP wine labels provide the wine hobbyists with an affordable way to label your wine. These pre-printed, customizable labels come in package of 5 - 8.5 by 11 sheets and are laser and inkjet printable. Stoney Creek's Label Maker wine label software completes the product offering. \/
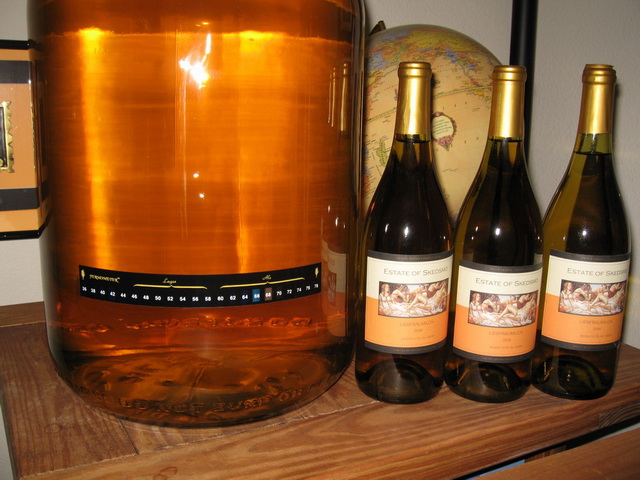
14. Lay the bottles on their sides of wine rack (bought at the Cost Plus) and leave in a dark, cool, temperature-stable place 15. Wait at least one month for white wine but it would improve even more after three months and 1 year for red wine before we taste our wine
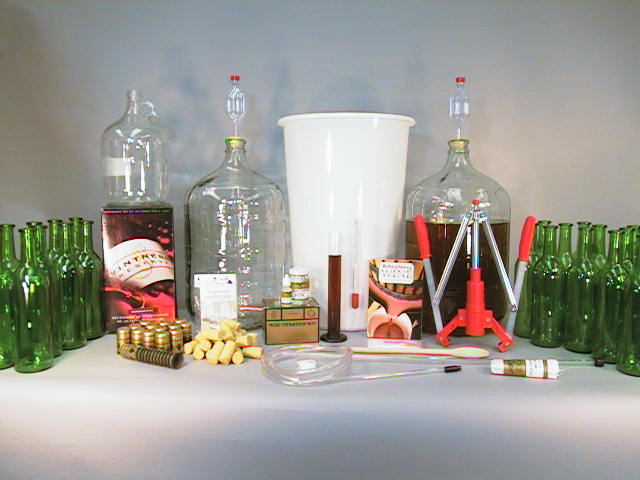
Please click the following link to see a list of equipment that you will need for winemaking. And also see the winemaking log but please do not take it as perfect winemakng instruction. It is just to give you an idea of how important it is to keep records for your future reference so that you will not repeat your mistake.
|
 Prelude to the Winemaking . . .